
If you’re starting an online program – or looking to improve one you already have – then you should...

Are looking to up your game when it comes to your online business’ onboarding experience? Well, look no further… We’ve curated all of our favorite tips and tricks to create a memorable onboarding experience for your audience.
In true Searchie fashion, we’re keeping things simple. We know how busy you are, so that’s why these tips are short, sweet, and to the point—highlighting each idea for your onboarding experience.
Oh, and we’re linking additional reading and resources for you, too! We’ve got you covered if you want to learn more about the specific features and elements involved in the implementation of these sweet tips.
Whether you’re new to the platform or a seasoned pro, you’re bound to find something new and helpful in these 20 onboarding tips…
1. Customize Your Login Page
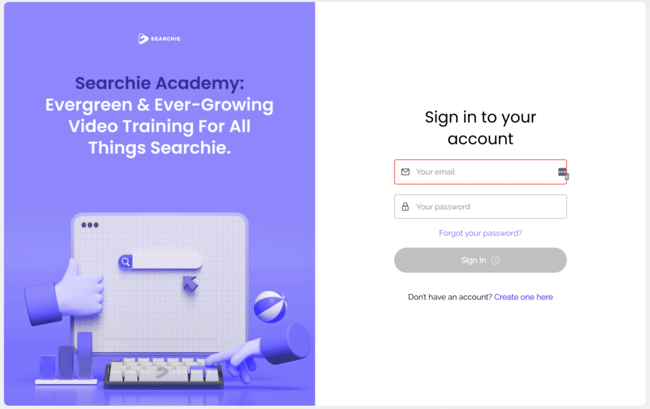
We recommend customizing your login page in order to create a great first impression!
The login page is what your members will see when they’re first registering and logging into your Searchie Hub. Keep in mind that this page will only appear if your Hub is set to private. Public Hubs won’t need a login page.
Then, you can choose to upload your business logo, or use our Canva integration to design your logo, without ever leaving your Searchie account. Once you’re happy with your customizations to your login page, hit save in order to mark your progress.
This method is one of our favorite ways to create a memorable audience onboarding experience because, after all, they say first impressions do make a difference!
2. Make Use Of The Personalization Feature
Using Searchie’s personalization feature is a quick, easy, and effective way to make your Hub experience more personable for each audience member. Keep in mind that in order for the personalization to be available, you’ll need to set your Hub to private.
Start by adding a Call To Action Section. Then, you can add personalization features to a title, description, or external link. For example, set the title as “Welcome Home”, and whatever you want to say as a greeting. To input your personalization, click on the person icon and select what you’d like to add: a user’s full name, first name, last name or email.
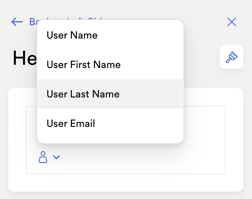
We like to use their first name, so the homepage message reads; “Welcome Home, firstname”.
This field will automatically update with whatever your user’s first name is. Cool, right? Feel free to get creative! Maybe you want your message to say: “We think you’re really going to like it here, firstname”.
Make your audience feel right at home the moment they enter your Searchie Hub!
Package Your Paid And Free Content With Searchie Hubs
Have you heard of Searchie Hubs?
Hubs are where you can package up your media content in Searchie to serve your audience. Choose between public or private privacy settings, free or paid content, and so much more.
To learn more, visit searchie.io or sign up for a live training call.
3. Link To Your Email For Additional Support
Have you ever had a question, but it was impossible to get a hold of a person (or company) to actually ask your questions?
One of the easiest ways to support your users through their Searchie Hubs experience is to add a place for them to “contact us” — er… contact YOU.
To do this, add an email link under any external link inside of your platform. This direct link will lead users to their inbox with your email already auto-filled for them.

This help article will show you how to add an external link. This will allow your members to contact you if they do have any questions and be able to automatically email you upon clicking the link.
4. Link To The Audience Account Settings Page
Who doesn’t like to personalize their own account? One of the easiest ways to get your own members to engage with their own audience profile is to send them the link to their personal audience page.
Your audience members can update or change their email address, phone number, first and last name, profile picture, password, and more. This allows your members to make sure their personal information is up to date.
This help article will help you understand Hub pages, including the Audience Account Settings page.
5. Film A Welcome Video And Add It To Your Searchie Hub
Lights, camera, action!
Creating a welcome video for your Hub is a quick and easy way to personalize your members’ onboarding experience. Even if you don’t have a specific onboarding page, you can still add this welcome video to your Hub homepage.
When creating your welcome video, try to keep it tight. A quick one-minute video is all you need to let your audience know what they can expect from their journey inside your Searchie Hub.
Not to mention, it’s a great way to set the tone for how fun and exciting your audience members’ experience will be!
Download the Searchie Chrome Extension for free, and create your welcome video with limitless recording. Use as many takes as needed, none of your recordings made with the Chrome extension count towards your monthly uploads.
6. Segment Your Audience Based On Onboarding Completion
You wouldn’t want someone brand new, watching the same content as a member that has been in your Hub for weeks, right? Using Audience Segments, your audience members will be able to unlock content after a specific onboarding task is completed.
Audience Segments allow you to set up an onboarding sequence to map out a success path for your audience. This means they’ll start with content for first-time Hub viewers and unlock the next step from there.
Using an assessment, your new audience members will be able to determine where they are in your onboarding experience. This is a great help article to assist you in initiating your onboarding sequence.
7. Edit Your Hub’s Custom Email Templates
If you haven’t caught on already, we’re big fans of customizing and personalizing, wherever possible!
Customizing email templates for your Searchie Hub is an easy way to ensure that you deliver any information that your audience needs immediately upon registering, so they can start the onboarding experience.
What can you customize? We’re glad you asked… Adjust fields such as the sender name (is it coming from you or your company), the reply to the email that your audience will then be able to reply to (we recommend sending this to your support email or the email of your team member who manages your Searchie account), and much more.
Customize your email templates for your welcome email, magic link, and/or password reset. To learn more about the custom email features that Searchie offers, check out this help article.
8. Offer An Early Bird Bonus
The early bird gets the worm, right?
Creating an early bird bonus is a great way to motivate your audience to join your Hub, pronto. And it’s a nice way to reward your keen audience members with something sweet.
This can be easily created using a simple Audience Segment. If someone has access to your selected Hub, and if their registration date is on or before a specific date (your “early bird” time frame), it qualifies them for this early bird bonus.
As users automatically are populated into this segment, they will then be able to view any content that you have tagged as “early bird” with this Segment inside of your Searchie Hub. Learn more in this training video.

9. Film A Site Tour Video Using The Searchie Chrome Extension
Creating a site tour video is a quick and easy way to ensure that your members know how to use your Hub.
You can point out things like…
- The logo on the top left corner of the Hub that links audience members back to the Hub homepage when they click on it.
- The search bar and how it works. Try using an example term to show your audience the power of Searchie and how they can choose from search results.
- How to use the main menu that appears on the right side of the Hub.
- How to access any account settings.
- And where they can find your amazing content.
Just like we mentioned in tip number five, we recommend filming your site tour video using the Searchie Chrome Extension as none of your recordings made with the Searchie Chrome Extension count towards your monthly upload limits.
Download the Searchie Chrome Extension for free here, then check out these help articles to learn more about how you can use the Searchie Chrome Extension tool.
10. Provide Searchie Bar Examples
One really simple way to introduce the power of Searchie to your members is to give your members examples of terms that they can search for inside the members area. This can be done inside your Hub or with a Widget.
Simply start by creating a Search Section. When you are editing that Search Section, under “Search placeholder”, give an example of a term that your members can search through.
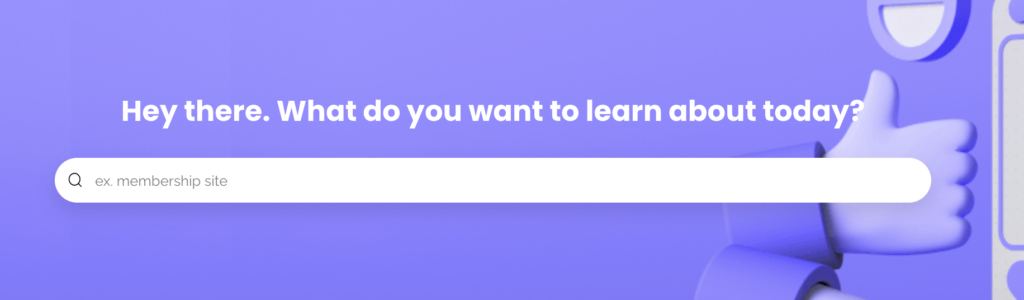
This will show your members that it’s more effective to search by keywords or phrases spoken, rather than full-length questions, and what sort of results will be presented to them.
This is something that you can easily implement to help introduce Searchie to your audience members as soon as they initially enter the Hub homepage.
11. Export A Segment For Your Email Service Provider
Are you planning on running an email campaign with the launch of your new online business?
Maybe your business has been around for a while, but you want to really show your audience all the awesomeness that you’re offering in your new Searchie Hub…
If you’re looking to run an email campaign, how are you planning to build an email list?
With Searchie, you can create detailed Segments in just a few clicks, that filter your users based on specific Hub access. Create and export your Segment directly from your Searchie account to your computer.
Once you’ve exported your Segment, simply import it into your email service provider (MailChimp, ActiveCampaign, or any other email marketing service!), and your mailing list is complete!
Read more and get the step-by-step instructions on how you can export your audience here.
12. Build An Onboarding Page To Combine Multiple Onboarding Elements
We’re giving you a treasure trove of our onboarding secrets, it only seems right to use them all together in one special space… By creating a specific onboarding page inside of your Searchie Hub.
If you have a couple (or a lot) of different onboarding steps, an onboarding page allows you to streamline their onboarding experience, without any content overwhelm. Your audience members will be able to watch your welcome video and site tour. They’ll see their name personalized on Hub Sections, view the detailed Call To Actions Sections based on their journey, access your linked assessment form, and so much more.
If your members ever need to access any of your onboarding resources, they can simply head back to the onboarding page, and there they are.

13. Keep Your Hub Homepage Simple
When you’re building a memorable onboarding experience for your members, one of the easiest things to do (that literally takes no extra effort at all) is to keep your homepage simple.
Why would we want to keep our homepage simple?
Say it with us… To. Avoid. Overwhelm! We’re all about eliminating overwhelm and making new tech experiences exciting, not daunting. Keep things on topic, there’s plenty of time to get to know your audience, first show them around.
Here are some key points to focus on:
- Welcome video: welcome your audience members into your Hub!
- Core features: highlight core features, like the search bar
- Hub tour: what’s new inside of the Hub and where they can find it
- Keep it tight! We don’t want to let the homepage get too full of content. That just means more distraction for your audience members, keep your homepage simple
Try limiting the amount of Hub Sections that you use to build out your homepage, in order to ensure that your members are focusing on what you want them to focus on. What you’re doing is narrowing things down and making sure that your top resources are the ones that your members will automatically gravitate towards.
14. Use Google Tag Manager And UserGuiding To Create A Customized Site Tour
Full disclosure, this tip isn’t free. As we mentioned, we’re including a variety of tips and tricks for users at different points of their online business journey. This tip involves two additional platforms: UserGuiding and Google Tag Manager.
UserGuiding allows you to highlight specific parts of your screen, so that your audience is prompted to click on specific buttons, links, or locations to “learn more”, or whatever you choose the prompt to be.
To learn more, check out this blog we wrote: How To Create A Customized Hub Tour For Your Audience: The Ultimate Onboarding Experience, or check out this help article to see how Google Tag Manager works with your Hub Settings.
15. Personalizing Your Hub With An Assessment Form
Creating and linking an assessment form inside of your Searchie Hubs is a great way to utilize a lot of other onboarding features, such as email personalization, and/or the ability to segment your audience.
This can be accomplished inside of your Hub by using Zapier to pass information from a Typeform (you could also use a Google Form) through Zapier, back into your Searchie account.
This means that the next time your audience logs in, after they complete the assessment, they’ll be able to see their very own tailored content experience.
Want to learn more about what’s required when it comes to personalizing your Hub with an assessment form?
This article covers the step-by-step instructions for you to set up an assessment of your own.

16. Customize Your Player Settings
Customizing your Player Settings is a great way to introduce your audience to what Searchie is and how the Media Player can be used.
Your Player Settings refer to all of the different options that appear inside of your Media Player. They are completely customizable and easy to access. Just click the top-right corner of your Searchie account, click on your “Profile” icon, then click on “Settings” inside of your settings menu to head to “Player Settings”.
From there, toggle between more than 30 different control options including file appearance, privacy, captions and more.
Pro Tip: We recommend toggling your captions on by default. That means, when your audience plays a video clip, they’re able to see the transcription appear automatically at the bottom of the Media Player, making your content more accessible.
17. Film A Video Walkthrough Of How To Use Your Media Player
Filming a video walkthrough for your Searchie media player is a great way to introduce your audience to how they can use Searchie. More specifically, when we refer to the Media Player we refer to the formatting that holds all of your content inside of Searchie.
So your Media Player is basically how your media will appear (or play) based on how you customize your Player Settings. Different options can appear at the bottom for your audience, like volume, options to adjust speed or quality and toggles for captions or downloads.
18. Share Searchie Via Email
If you’re looking for a way to make your audience more familiar with Searchie and how Searchie works before you actually onboard them into your Searchie Hubs, consider attaching a specific Searchie file to an email that you send.
Attach an individual Media File or the full Playlist that you’d like to share with your audience by clicking on the three dots (ellipsis) menu and clicking on “Copy URL”. That will copy the URL to your clipboard, which you can then paste inside of an email or use to hyperlink.
19. Add A What’s New Playlist
Adding a “What’s New” Playlist into your Searchie Hub is a great way to add some dynamic content into what can otherwise be a static homepage.
We love that the “What’s New” Section reduces content overwhelm by giving your audience an exact number of videos that you want them to focus on. Plus, you can highlight the latest and greatest from your course, membership or coaching program.
Pro Tip: We like to cap our What’s New Section Playlist to four videos, allowing your audience to focus on a small, specific amount of content. You can automate your Playlist by adding files from a File Tag, Folder, or by manually adding them in. Try replacinge your Wwhat’s Nnew videos every few weeks, which gives your audience more than enough time to consume the content that you’ve made available to them.
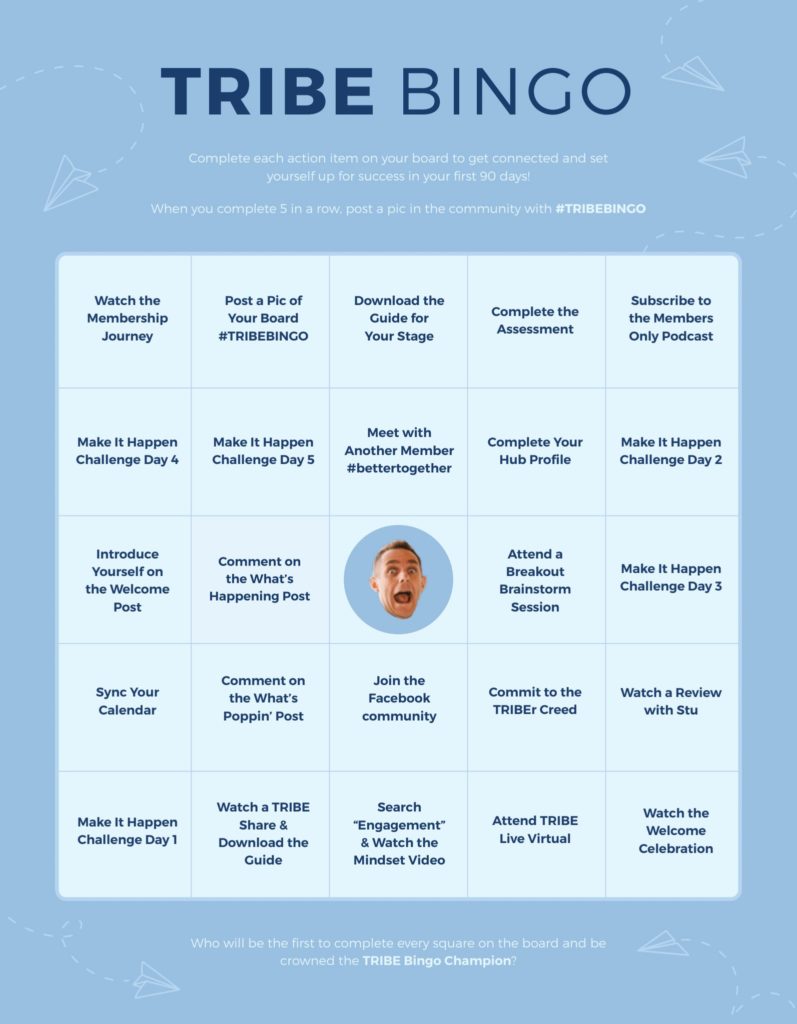
20. Include A Bingo Board
Adding a “bingo card” as part of your onboarding sequence is a great way to combine multiple onboarding elements that you’ve provided for your audience. You can add a bingo card by attaching your document as an external link in any section that allows you to input onean external link.
Check out the bingo card example below, from the TRIBEribe Membership. This is Stu McLaren’s membership all about how to grow and scale memberships.
This full bingo board includes both the first 90 days for the membership and includes different elements that allows the community to engage. One thing that weI like about this is not only are youwe repurposing a lot of things that you’vewe’ve also added into our onboarding page, but you can create really granular challenges for your members, such as specific terms that they can look up inside of the Searchie search bar, which allows them to then find videos that you want them to watch.
So, for example, one of the tiles on the bingo card read “Search “Engagement” & “Watch the Mindset Video”. This allows your members to engage with the search bar at the top to search “Engagement”. And, to see the results that come up.
Keep in mind that there is no limit on the number of external documents that you can attach for your members. So keep it simple and organized, but also have fun!
Want to learn more about these tips?
Catch Paulina as she dishes out all 20 of these tips in this Playlist:
Have a question? Reach out directly to paulina@searchie.io
Catch you in the next blog!
Reimagine Your Business
Create the ultimate digital content experience for your information business with Searchie Hubs. Courses, memberships, coaching programs... you name it!